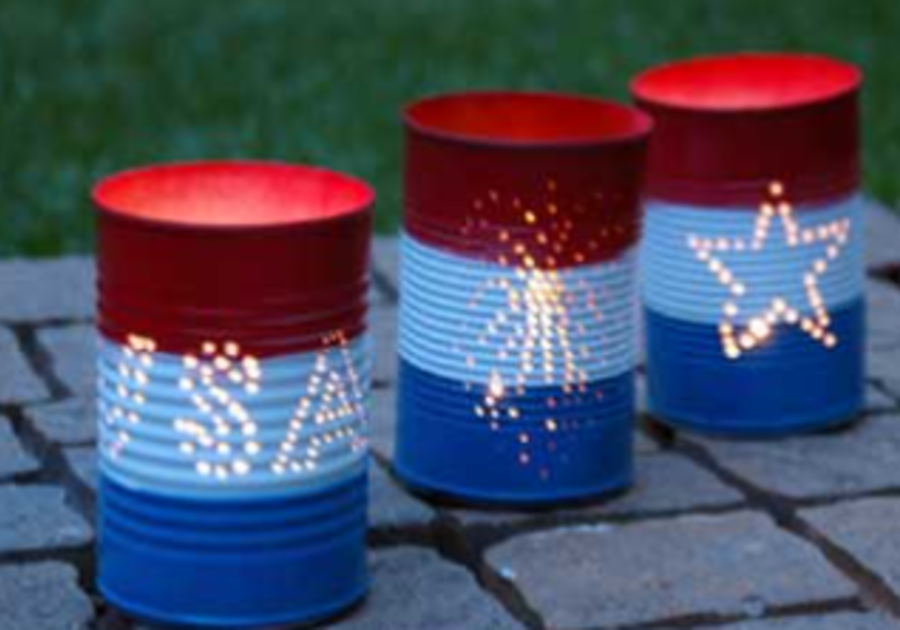

Tin Can Luminaries
These tin can luminaries are beautiful lit up at night, with a tea light candle sitting inside.
They make your outdoor party more festive and patriotic! These look great along the walkway welcoming your guests or putting them out for your firework display. Take them along when you go camping. People will love the fact that you made them. What an awesome way to reuse a tin can!
The best part is they are made from empty vegetable or soup cans, so you'll be able to collect a bunch of them quickly!
Read on to learn how easy it is to create this fun craft.
Materials Needed:
- Empty vegetable or soup cans, cleaned out, and labels removed
- Water
- Sand
- Nail
- Hammer
- Scrap paper
- Ruler
- Tape
- Spray paint in red, white, and blue
Instructions for Tin Can Luminaries
1. Begin by filling the cans with some sand. This is a tip from one of our readers. Placing sand in the cans first stops any swelling of the can that may occur when the water is frozen. Then, fill the can up to the top with water. Place them in the freezer until the water is frozen solid. This will allow you to hammer a nail into the side of the can without the can denting.
2. Next, think about some designs you want to punch into the sides of the can. I chose to punch the letters the USA, a star, and some fireworks. Cut out your templates, place them on the can, and trace around them with a permanent marker (or draw freehand).
3. Continue making the tin can luminaries by using a nail and hammer to punch out the design. Start at one end of the pattern and place the nail along the line. Gently pound the nail in with a hammer. The nail will go through the can into the ice. Continue working around the pattern until the design is punched out.
4. Allow the ice in the can to melt, and dry the can completely.
5. Next, spray the bottom portion of the cans blue with the blue spray paint. Protect your work surface with newspapers and use good ventilation (preferably outdoors like I did).
6. When the cans are completely dry, cut a piece of scrap paper to wrap around the can. Make it 1/3 the height of the can. The cans I used were 4.5 inches high, so I made my first strip of paper 1.5 inches. Wrap the paper around the bottom part of the can, covering the blue painted area, and tape it closed.
7. Now take the cans outside again and this time give them a good spray of the white spray paint, and allow the cans to dry well. When they are dry you can remove the paper strip.
8. Next, make another paper strip 2/3 the height of the can. In my case, I made the strip of paper 3 inches wide. Secure around the blue and white portions of the can, leaving only the top portion exposed, and secure with tape. Take the cans outside again and this time spray the top section with the red spray paint, and allow to dry. Remove the paper strip and you will see the pretty red, white, and blue stripes.
9. If you want to further decorate the luminaries, this is the time to do it. If you would like the designs you punched to show up better you can paint them a different color, such as black. When you are ready to illuminate, add a little sand to weigh down the cans and add a tea light candle. Your guests will love them!